Showing posts with label wall hanging. Show all posts

Wednesday, October 24, 2012

Choirs singing, bells ringing . . .

Today I can reveal my finished Christmas wall hanging! Woot!

You may remember that during the summer we had a scrumptious giveaway of Jacquelynne Steves' fabrics, and that I've been creating a wall hanging from them, as well. It's the "Oh, Holy Night" line and you can get it in fabric stores now, and whip up some beautiful Christmas items!


My previous posts here, here, and here showed some of the steps involved, including some cool 3D embellishments on the border.

Now I have finished the outline quilting on the nativity scene, and my free motion meandering on the borders. It's even bound, and has nice triangle nooks for dowels to go into (on the back) so that it can hang nicely.

Would you like to see it? Would ya? Aww, please, don'tcha want to take a peek? It will make me feel better, if you say "yes." (Grin)

Here we go!


Well, that's not the best photo in the world....got some errant shadows and sunshine there . . . here are some close-ups whilst I look for a better shot of the whole!


These are examples of the cute characters on the panel . . . I outline quilted these to draw attention to them, without overwhelming them. Even the animals got the star treatment:


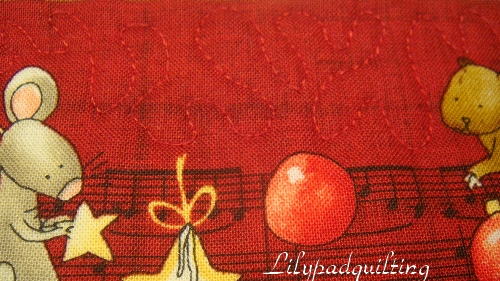
The borders with the ornaments and 3D embellishments got some free motion work. This was great practice for me --- yes, there are a whole slew of boo-boos and flaws, but they don't look too bad from about four feet away! (Wink)


Sorry the last one is blurry -- I love the mousie, and wanted to show him off!

All in all, I am pretty happy with how this turned out. I'm looking forward to hanging this at the Christmas season, and having some kids around even if they are on the wall! Have I mentioned that I seriously need some grandchildren frolicking (is that spelled correctly?) around in this house? 

I'd really like to thank Jacquelynne Steves for giving me the opportunity to design with her beautiful fabrics! I hope that y'all will check out these linkies ( here, here, and here ) and add some to your stash and enjoy them!

Here's my finish!


Thanks for stopping by today!
I'm linking up with the Thursday Favorite Things blog hop at Katherine's Corner and at Melissa's blog. Stop by and see all the creative bloggers!

Love,


Friday, October 12, 2012

Just a peek

Every moment that I can steal away and quilt, I've been working on my wall-hanging . . . but in spite of my best intentions, that has not been as often or as much as I would like. But I thought I would show you a peek at how it's progressing!

I'm no expert at the free motion quilting that I admire other people doing, but I think I'm getting better at one part of it --- meandering (or stippling, as some people call it). 

Tell me what you think (please be kind!):


I'm filling in an area with adorable animals and Christmas ornaments, and I'm trying to avoid stitching over them! I think they are so cute that I want them to show up with no stitches across their little faces and bodies!


I'm hoping to be able to reveal the whole wall-hanging soon! 

Love,


Saturday, October 6, 2012

3 Dimensional FUN !!

Remember that Christmas wall-hanging that I was working on? I had to put it on hold for a short while, but I'm back to work on it now, and I want to show you something cool. Alright, so I have dated myself there, by saying "cool." At least I didn't say "far out" or "groovy" or something else embarassing. Ahem.

The wall-hanging that I'm speaking of (or is that the wall-hanging of which I speak?) is the one I created from the lovely Jacquelynne Steves Christmas fabrics and panel.


I wanted to make the ornaments around the edge of the panel really pop, so I thought I would try some three dimensional embellishments. I think I mentioned before that I found a quick and easy way to make leaves over at Linda Matthews' blog.
All you do is take a piece of your chosen fabric, and fold it over a piece of fusible web, like steam-a-seam or wonder under. Iron it so that it's all fused nicely, then trace your leaf template onto the fabric. When you cut the leaves out, there will be fabric on both sides, and no need for finishing the edges. Unless you are a sucker for more work and just have to do it. Me? I was quite content with my "lazy leaves."

I found some satin ribbon in my stash, but any ribbon will do if you wish to use this technique. I tied a bow and ran a couple of stitches through it, then tacked the bow and holly leaves to the "hanger" of each ornament ball.

Want to see? Aww, you're so nice. OK, I just happen to have some pictures to show you. (Grin)


See how the leaves and ribbon are sitting up, off the fabric panel? I love it! Look at the shadows behind them . . . to me, that adds a lot of interest to the ornament.


That's a picture of a corner of the wall-hanging, so you can see two ornaments.

Here is a close up of Mr. Mousie, in his cameo role on one of the balls. Please excuse the unclipped threads there. 


And here are two more:


Well, I can hear some of you humming "Jingle Bells" already, so I must have put some of you in the mood to create some Christmas magic! Be sure to check out Jacquelynne's fabrics and enjoy them -- they are so lovely!


Love,


Friday, May 18, 2012

Bloggers Quilt Festival - My Art Quilt!

Hi everybody!  I'm entering the Bloggers Quilt Festival, hosted by Amy over at Amy's Creative Side. 
I thought I would tell you the story behind my art quilt.
I was so excited to guest post this spring at Jackie's Art Quilts! When Jackie asked me to prepare a guest post, I had a lot of conflicting emotions --- I was happy, but I was also intimidated! I think she is an awesome art quilter, and I love seeing her creations here on the blog!

Jackie, Sunni (from Love Affair with my Brother) and I had all posted tutorials here at the Lilypad, for 3D embellishments for tote bags and other projects that needed a little WOW! added to them. (If you would like to check them out, you can click on the Tutorial page here at the Lilypad.) We had a ball, and I was still thinking along those lines when I came up with the idea for a 3Dimensional art quilt. I call this wallhanging "Spring Dreams" and I like how it turned out!


(If you would like to create your own Spring Dreams just head over to my tutorials page, and you'll find all of the instructions there.)

To make the long story short, I "created" some fabric for the background, with a "wonky" way of piecing different fabrics together, and then I dreamed up some flowers that would be 3 dimensional, instead of flat on the background.

Check out these blooms:


I added stems for the large flowers, and made loopy leaves for them, as well.
I wasn't finished yet, though! I stitched some little butterflies in the open areas, just because I like butterflies!


So, my art quilt was done. I was exhausted from "stretching my boundaries" but doing something new is a very good thing, I decided. At least once in a while.


I'm so glad that you came to visit with me during the Bloggers Quilt Festival!

Be sure to go to Amy's Creative Side and check out all of the wonderful quilts and projects linked up there!


Love,