Showing posts with label farmer's wife. Show all posts

Thursday, April 26, 2012

It's Finished!

I wanted to share my finished table topper with you . . . this one took a while, but I love it. I began this for Sunni's Farmers Wife in Your Life blog hop, and I thoroughly enjoyed making the squares and designing a home for them. 


I used the fabrics from the Butterfly in the Crossroads squares (I've heard from some quilters that this is also called the Tulip block) for the scrappy binding.  


I prefer a narrow binding on my toppers, so I cut the fabric strips just 1.5 inches wide. I know, some of you are gasping at my maverick ways, but I do use a single thickness of fabric on some toppers, since no one will be pulling it over them and snuggling . . . I figure they don't have to be quite as durable. It makes for a nice, narrow edge, and I think the color changes add something to the topper.


I have some other projects started, and I hope to show you some peeks soon. Till then, hope you find some time to sew - and if you need more fabrics or supplies, please visit our lovely sponsors!
I'm linking up today with the Shady Porch linky party, and with Katherine's Corner and Margaret at The World as I See It. for the Thursday Favorite Things linkup!
I'm also linking up with the Thursday Think Tank at Making Rebecca Lynne!
Love,


Sunday, March 25, 2012

Need a little advice here . . .

Hi ya'll! Remember this?


It's my table topper that I made for the Farmer's Wife in Your Life blog hop, that Sunni hosted. I'm gripped with indecision. Simply slammed with doubts. My brain is in overload mode, and that is plumb dangerous. 

I have a question for you, the special Lilypadquilting peeps:

Should I applique butterflies in the blank areas, like this:


Or should I embroider butterflies and maybe some text, like this:


I guess the text could be something sweet and sappy about butterflies, and spring, and things like that. 

Or should I just leave it like it is --- simple, and get 'er quilted?  Personally, I kinda like how the background lets me focus on those blocks, but then again . . .

The binding will be a narrow, scrappy one, with the left-over fabrics from the blocks: pink, green, blue, lavender.

Please! Help me out here, and leave a comment to tell me what you think! (Grin) I'm leaning toward the third option, but if you think I should do differently, won't ya tell me about it?

Love,

Thursday, March 15, 2012

Farmer's Wife Table Topper

Welcome back to the Lilypad, all of you Farmer's Wife in Your Life blog-hoppers! I'm glad to be hosting again today, and I hope that you will enjoy this project.

If you recall, last week I showed you how to construct the "Butterflies at the Crossroads" block, and incorporate it into a placemat . . .


Well, this week we will make a table topper using the same block! I hope you're not bored with me.

Are you bored? 

Would a picture of Padsworth's antics in my sewing room help?


Ever get the feeling you are being watched?
(He likes to advise me on my stitching.)

Now, back to our table topper!

I chose these fabrics for my butterflies. Can you tell I'm thinking of spring? Sigh. I am so ready for the warm weather and blooming things.


You can refer back to the instructions for the individual blocks here. Here are the finished blocks for the table topper --- I made two of each color, except for the dark pink. Just one of those. I used the max that Sunni said we could utilize in our project: nine blocks.


Two green . . .

Two purple . . .
        Two blue . . .


Two pale pink . . .


And one dark pink. 

After that, I bordered them with black, just as before, and then started cutting blocks to go between the Butterfly blocks. With the black border added, the blocks were seven inches square, so I cut width of fabric strips seven inches wide, then cut them into the pieces to go between the blocks. You can see the pieces on the diagram here:


The "A" blocks were 7 x 13; the "B" blocks were 7 x 7; lastly, the "C" blocks were 7 x 20. (Somebody better check my math . . . I think that's what I got.)

Like my cool diagram? I did it with my fav photo editing software: Paint.net! (Wink)

I used a 1.5 inch strip around the edges, because I thought it looked more finished that way.
Currently, the table topper is pinned and ready to quilt. I think that I shall machine stitch like I did the placemats, and then use the colors in the blocks for a scrappy binding!


Be sure to check out all of the blogs that are participating in this hop --- lots of inspiration and good ideas!
Week 1
March 4-Sunni guest-posted on Jolly Jabber
Week 2
March 14-It's Sew Kiki
Week 3


Then, starting on March 24, and ending on March 31, there will be a fun Linky Party! Show us your Farmer's Wife in Your Life project, using from just one to nine of the blocks . . . You can link up a blog post or a Flickr photo, and there are prizes to be won! Yippee! Hoppy froggies!

Winners will be awarded some scrumptious prizes . . . just look --- these'll crank your tractor! (Grin)

The Intrepid Thread is sponsoring a FQ bundle of the amazing Cosmos by Dan Bennett for Rowan.


Cool, huh? But wait! There's more! 

Fat Quarter Shop is sponsoring a FQ Bundle of gorgeous Poetica by Pat Bravo for Art Gallery Fabrics.


Whooooeeee! The winners of those lovelies will be happier than a piglet snuggling with his mama! (A little Farmer's Wife humor for you!)

So whatcha waitin' for?  Get your Farmer's Wife in Your Life project done, and enter the linky party next week!!  

Love,

Wednesday, March 7, 2012

"Farmer's Wife in Your Life" Bloghop - My Turn!!


I'm so excited to be participating in Sunni's bloghop --- taking the wonderful blocks from the Farmer's Wife sampler quilt and utilizing them for everyday items is sheer genius!

I've been watching several quilters over at Ole Frog Eyes that are working on FW quilts, and they are really lovely. Check out this one that Yvette is constructing:


Awesome, isn't it? But I am just not ready to commit to a Farmer's Wife project that large . . . but I jumped at the chance to make something smaller when Sunni contacted me.

I was inspired by block # 114. I believe it is called Butterfly at the Crossroads, and I chose it because I'd never made that particular block before. (OK, you twisted my arm just enough. To be truly honest, I chose it because it didn't have any Y-seams, and it looked like I could make it without using paper piecing. There. Are you satisfied now?)  Hmmph.

I'll show you the block, and then we'll get into the tutorial.


Instead of Butterfly at the Crossroads, I think I see a sugar cube and four butterflies having a little snack. But that's beside the point.

I chose to incorporate my blocks into placemats. Here's how I made the block, and then how I made the placemat . . .

You need to cut out some squares and some rectangles. Lessee here, the squares should be 1 5/8, and the rectangles will be1 5/8 wide and 2 7/8 long. I cut nine green squares, and four white ones. Then I cut four rectangles.

Now, four of the green squares will be sliced in two, diagonally, to make eight itty-bitty half square triangles. These little pieces were worrying, er, scaring the bejabbers out of me, so I broke down and starched all those bad boys into submission. (Annie, please don't hate me. I had to do it. Wink.)


I divided the block into regions, and made them one at a time. Here is the first one --- we'll call it region A, for lack of a better name. I guess we could call it a butterfly. You like that better?


Here is that region, er, butterfly, sewn together:


Now, here are two butterflies with a rectangle between them:


Finger press and repeat, so that you have two of those.
For the middle row, you need two of the white rectangles and one green square, pieced like so:


Now you are ready to sew all three rows together, and get a six and one-half inch block! It will finish at six inches, once you sew quarter inch seams to add it to your project.


This is your completed Butterfly at the Crossroads block:


To finish off the block, I added a (very) narrow black border. I think I cut the strips of black at 3/4 inch.

Now let's make some placemats! You might want your placemats to finish at a different size than mine. I actually measured some fabric, and had one of my everyday plates sitting on it! I mapped out how large I wanted it to end up, added for quarter inch seams, and then flew by the seat of my pants. (I was headed toward a finished size of 12 x 18, but I think I ended up with 12 x 17.75, instead.)

As near as I can tell from my scratched out notes, I had a large rectangle about 10.5 x 11.5 inches, and a smaller rectangle (7.0 x 4.75 inches) to sit atop the Butterfly block. On the left hand side of the block, and on the bottom, too, were narrow strips. The vertical one was 11.5 x 1 and 3/8 inches, and the horizontal one below the butterflies was 7.0 x 1.25 inches.

Now, to make it more clear, here is what I ended up with when I added those rectangles and strips to my block. I drew some lines on the photo, so you could see what's going on here:


Here is your placemat without the funny white lines!


Now it's time to sandwich the mat with some batting and backing, and do some quilting!

I did some free-handy stuff on the Butterfly block. I kinda like how it turned out:


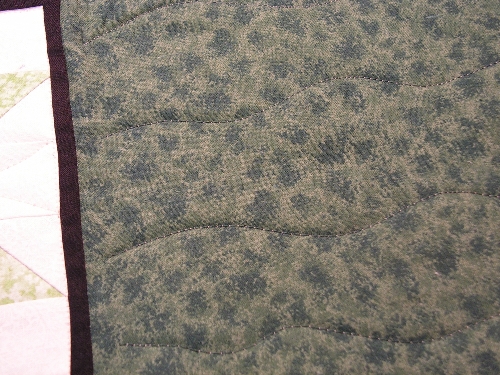
Then I did some wavy lines on the mat. (Brutal honesty, here. Are you ready for this? I did the wavy lines because then you wouldn't be able to see mistakes, like you could if I tried straight lines, or a grid, or something like that.)
Here are some pictures of those wavy lines:


And now I get to show off my finished placemat, with a narrow binding (about 3/8 inch) of the same light green as my butterflies are made of:


Voila! The placemat! She is finished!

Now you will have to excuse me, since I need to go and make a few more of these! I hope you enjoyed this tutorial, and I hope you'll visit all of the other bloggers on this hop for more projects and inspiration.

Be sure to join the linky party, too, and show off your own creations! You might just win a super-nice prize!!

Love,


PS I'm linking up today with the Shady Porch's Rock and Share linky party! Check out all the projects over there, too!

Saturday, March 3, 2012

Starting on Sunday . . . "Farmer's Wife in Your Life" bloghop!


Farmer's Wife in Your Life is a series inspired by The Farmer's Wife Sampler Quilt by Laurie Aaron Hird. The series will focus on using 6" quilt blocks in everyday sewing projects. 

It starts with a preview post on Jolly Jabber on Sunday, March 4th! 

There will be three full weeks of fun!

Here's the schedule:


Inspiration and Tutorials from Designers
Blog Hop
Week 1
March 4-Sunni is guest-posting on Jolly Jabber
Week 2
March 14-It's Sew Kiki
Week 3

Linky Party
Linky Party will be open from March 24-31 with 2 winners announced the next week. You can link up any project that is inspired by The Farmer's Wife Sampler Quilt and uses anywhere from just one, to nine of the  6" finished quilt blocks. The blocks do not have to come from the book. 

Please link up a blog post or Flickr photo for your entry.

Judges
Sunni says, "I just nearly died when both of these amazing ladies agreed to act as judges!"
Laurie Aaron Hird, author of The Farmer's Wife Sampler Quilt  
Michele Foster, Quilting Gallery
The third judge will be Sunni Bolger, Love Affair with my Brother 

Prizes


The Intrepid Thread is sponsoring a FQ bundle of the amazing Cosmos by Dan Bennett for Rowan.


Fat Quarter Shop is sponsoring a FQ Bundle of gorgeous Poetica by Pat Bravo for Art Gallery Fabrics.


Padsworth and I are looking forward to seeing the projects the designers have completed, and we hope you will jump in and enter a project in the linky party, too! There are some great prizes there!

Love,


Wednesday, April 27, 2011

And now, the winner of the voting!

It was a tight race, Padsworth. Some of the voters complained about the difficulty of the choice - both contestants were worthy opponents (actually friends!) and each  of them had sterling qualities.....

OK, this is not really a political contest here! There were two lovely quilts in progress by two wonderful craftswomen; Joy Denise and Yvette both have awesome colors and workmanship in their Farmer's Wife Samplers, which can be viewed in the gallery at OleFrogEyes.

When the votes were tallied, it was Yvette that squeaked past Joy Denise for the win! Congratulations, Yvette!

Love,

Wednesday, April 6, 2011

Froggie Feet

Hi! I'm Jacque, and this is the inaugural post for the OleFrogEyes community of quilters! We're (Padsworth and I) hoping that our happy group will grow and grow.

Did I hear you ask, "Who is Padsworth?" Why, he's our mascot; see him up there on the right-hand side? He has asked me to fill in for him: he wanted a blog so badly, but honestly, just look at those froggie feet. Do you think he can navigate around a keyboard?!  :)  He'll be nudging me when he thinks a topic needs to be discussed, or when he sees someone post some awesome blocks on the OleFrogEyes site. He tells me he even has some giveaways planned, so stay tuned!

OleFrogEyes is a dynamite quilting tool - a virtual design wall for laying out a design, or keeping track of which colors you need to place in your next block. It can even serve as a template for stitching your blocks together, when you are working on a mega quilt like Dear Jane or Sylvia's Bridal Sampler.

Are you and a quilting friend working on the same project? Perhaps the popular Farmer's Wife quilt? You can see each other's progress so easily when you subscribe to Padsworth's site! I see some competitions starting here!

Are you unsure of what colors to use for your borders, or lattice? Create your quilt layout, upload some of your quilt blocks to OleFrogEyes, and then audition colors to your heart's content! You can play with your blocks in the intersections of the lattice, too! Padsworth seems to think of everything!

Want to join our community? Just hop on over, er, click on this URL: http://olefrogeyes.tfldd.net and sign up today! Padsworth has heard from many quilters that the price is really reasonable: for about the cost of just one fat quarter each month, you can show off six of your works in progress! See you there! Ribbit!