

I'm so excited to be participating in Sunni's bloghop --- taking the wonderful blocks from the Farmer's Wife sampler quilt and utilizing them for everyday items is sheer genius!
I've been watching several quilters over at Ole Frog Eyes that are working on FW quilts, and they are really lovely. Check out this one that Yvette is constructing:

Awesome, isn't it? But I am just not ready to commit to a Farmer's Wife project that large . . . but I jumped at the chance to make something smaller when Sunni contacted me.
I was inspired by block # 114. I believe it is called Butterfly at the Crossroads, and I chose it because I'd never made that particular block before. (OK, you twisted my arm just enough. To be truly honest, I chose it because it didn't have any Y-seams, and it looked like I could make it without using paper piecing. There. Are you satisfied now?) Hmmph.
I'll show you the block, and then we'll get into the tutorial.

Instead of Butterfly at the Crossroads, I think I see a sugar cube and four butterflies having a little snack. But that's beside the point.
I chose to incorporate my blocks into placemats. Here's how I made the block, and then how I made the placemat . . .
You need to cut out some squares and some rectangles. Lessee here, the squares should be 1 5/8, and the rectangles will be1 5/8 wide and 2 7/8 long. I cut nine green squares, and four white ones. Then I cut four rectangles.
Now, four of the green squares will be sliced in two, diagonally, to make eight itty-bitty half square triangles. These little pieces were

I divided the block into regions, and made them one at a time. Here is the first one --- we'll call it region A, for lack of a better name. I guess we could call it a butterfly. You like that better?

Here is that

Now, here are two butterflies with a rectangle between them:

Finger press and repeat, so that you have two of those.
For the middle row, you need two of the white rectangles and one green square, pieced like so:

Now you are ready to sew all three rows together, and get a six and one-half inch block! It will finish at six inches, once you sew quarter inch seams to add it to your project.

This is your completed Butterfly at the Crossroads block:

To finish off the block, I added a (very) narrow black border. I think I cut the strips of black at 3/4 inch.
Now let's make some placemats! You might want your placemats to finish at a different size than mine. I actually measured some fabric, and had one of my everyday plates sitting on it! I mapped out how large I wanted it to end up, added for quarter inch seams, and then flew by the seat of my pants. (I was headed toward a finished size of 12 x 18, but I think I ended up with 12 x 17.75, instead.)
As near as I can tell from my scratched out notes, I had a large rectangle about 10.5 x 11.5 inches, and a smaller rectangle (7.0 x 4.75 inches) to sit atop the Butterfly block. On the left hand side of the block, and on the bottom, too, were narrow strips. The vertical one was 11.5 x 1 and 3/8 inches, and the horizontal one below the butterflies was 7.0 x 1.25 inches.
Now, to make it more clear, here is what I ended up with when I added those rectangles and strips to my block. I drew some lines on the photo, so you could see what's going on here:

Here is your placemat without the funny white lines!

Now it's time to sandwich the mat with some batting and backing, and do some quilting!
I did some free-handy stuff on the Butterfly block. I kinda like how it turned out:

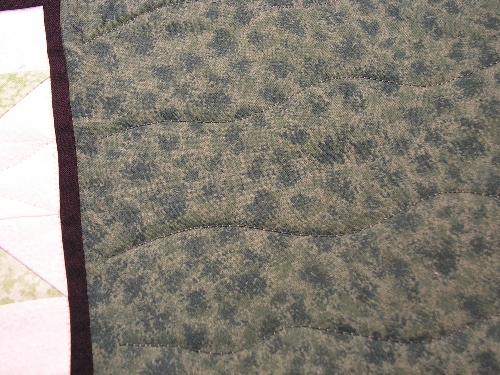
Then I did some wavy lines on the mat. (Brutal honesty, here. Are you ready for this? I did the wavy lines because then you wouldn't be able to see mistakes, like you could if I tried straight lines, or a grid, or something like that.)
Here are some pictures of those wavy lines:

And now I get to show off my finished placemat, with a narrow binding (about 3/8 inch) of the same light green as my butterflies are made of:


Voila! The placemat! She is finished!
Be sure to join the linky party, too, and show off your own creations! You might just win a super-nice prize!!
Love,

PS I'm linking up today with the Shady Porch's Rock and Share linky party! Check out all the projects over there, too!
Very nicely done! And green for St. Pat's - althought not a shamrock - it works for me.
ReplyDeleteWonderful block and placemat. Thanks for sharing!
ReplyDeleteHa ha.. I do wavy line quilting for the same reason. The organic look means there are no "mistakes" just design choices! Love it.
ReplyDeleteI love this! And the instructions were so clear and easy to follow. I agree with Sharon on the St. Patrick's Day colors too. :)
ReplyDeleteBeautiful! I've got a QAL on my blog for the Farmer's Wife Quilt. We're all having a great time learning the new blocks in our year-long endeavor. Sometimes it's fun to have those small finishes, too! Thanks for sharing.
ReplyDeletexoxo
Donna
Great placemats and wonderful tutorial!
ReplyDeleteGreat idea! Maybe your said it and I missed it but what were the dimensions of just the block itself? I'd love to try some of the FW blocks someday.
ReplyDeleteThat is a great idea. Are you planning on using a different block on each placemat? Nice tutorial.
ReplyDeleteYour placemat is so cute!! Love this idea!
ReplyDeleteI never thought of incorporating these blocks into other things (probably because I'm so busy trying to just get the quilt made!) but I love this!!
ReplyDeleteIt turned out BEAUTIFUL, and what a great way to spice up the dinner table and use more of my stash! heehee!
Joy
Love how this turned out especially the quilting on the block itself - great detail!
ReplyDeletePlace mats are an ongoing project in our Guild. I will pass this lovely idea along.
ReplyDelete