Showing posts with label sunni. Show all posts

Saturday, April 21, 2012

Let's all hop over to Sunni's place!

Sunni at Love Affair with my Brother is our host today for the Colonial Needle bloghop! In addition to having the blog with the most intriguing title I think I've ever seen, Sunni has a lot of inspiring projects and tutorials to offer! (For anyone who doesn't yet know, her title is referring to her fav sewing machine! Giggle!)

Sunni has exciting projects like these on her blog, and she is also hosting a Mystery Charm Swap! 


She combines traditional piecing with a modern palette, and does it with flair. Hop on over to see her post today, on the second-to-last day of the Colonial Needle hop! I'm amazed that she was even able to participate, since the love of her life will be deployed very, very soon. (Waves) God bless you, Mr. Sunni! Thank you for your service!

Love,


PS I hope you are still reading, cos one of our awesome sponsors is having a HUGE sale!! Click on the logo on the left-hand sidebar, to hop over to Quilt Kit Market, and then select "Clearance" for some jaw-dropping specials! Hurry and check it out!!

Wednesday, March 7, 2012

"Farmer's Wife in Your Life" Bloghop - My Turn!!


I'm so excited to be participating in Sunni's bloghop --- taking the wonderful blocks from the Farmer's Wife sampler quilt and utilizing them for everyday items is sheer genius!

I've been watching several quilters over at Ole Frog Eyes that are working on FW quilts, and they are really lovely. Check out this one that Yvette is constructing:


Awesome, isn't it? But I am just not ready to commit to a Farmer's Wife project that large . . . but I jumped at the chance to make something smaller when Sunni contacted me.

I was inspired by block # 114. I believe it is called Butterfly at the Crossroads, and I chose it because I'd never made that particular block before. (OK, you twisted my arm just enough. To be truly honest, I chose it because it didn't have any Y-seams, and it looked like I could make it without using paper piecing. There. Are you satisfied now?)  Hmmph.

I'll show you the block, and then we'll get into the tutorial.


Instead of Butterfly at the Crossroads, I think I see a sugar cube and four butterflies having a little snack. But that's beside the point.

I chose to incorporate my blocks into placemats. Here's how I made the block, and then how I made the placemat . . .

You need to cut out some squares and some rectangles. Lessee here, the squares should be 1 5/8, and the rectangles will be1 5/8 wide and 2 7/8 long. I cut nine green squares, and four white ones. Then I cut four rectangles.

Now, four of the green squares will be sliced in two, diagonally, to make eight itty-bitty half square triangles. These little pieces were worrying, er, scaring the bejabbers out of me, so I broke down and starched all those bad boys into submission. (Annie, please don't hate me. I had to do it. Wink.)


I divided the block into regions, and made them one at a time. Here is the first one --- we'll call it region A, for lack of a better name. I guess we could call it a butterfly. You like that better?


Here is that region, er, butterfly, sewn together:


Now, here are two butterflies with a rectangle between them:


Finger press and repeat, so that you have two of those.
For the middle row, you need two of the white rectangles and one green square, pieced like so:


Now you are ready to sew all three rows together, and get a six and one-half inch block! It will finish at six inches, once you sew quarter inch seams to add it to your project.


This is your completed Butterfly at the Crossroads block:


To finish off the block, I added a (very) narrow black border. I think I cut the strips of black at 3/4 inch.

Now let's make some placemats! You might want your placemats to finish at a different size than mine. I actually measured some fabric, and had one of my everyday plates sitting on it! I mapped out how large I wanted it to end up, added for quarter inch seams, and then flew by the seat of my pants. (I was headed toward a finished size of 12 x 18, but I think I ended up with 12 x 17.75, instead.)

As near as I can tell from my scratched out notes, I had a large rectangle about 10.5 x 11.5 inches, and a smaller rectangle (7.0 x 4.75 inches) to sit atop the Butterfly block. On the left hand side of the block, and on the bottom, too, were narrow strips. The vertical one was 11.5 x 1 and 3/8 inches, and the horizontal one below the butterflies was 7.0 x 1.25 inches.

Now, to make it more clear, here is what I ended up with when I added those rectangles and strips to my block. I drew some lines on the photo, so you could see what's going on here:


Here is your placemat without the funny white lines!


Now it's time to sandwich the mat with some batting and backing, and do some quilting!

I did some free-handy stuff on the Butterfly block. I kinda like how it turned out:


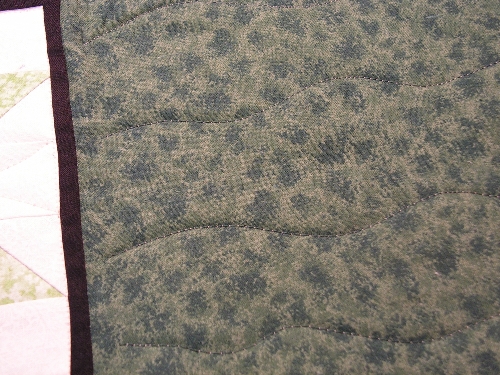
Then I did some wavy lines on the mat. (Brutal honesty, here. Are you ready for this? I did the wavy lines because then you wouldn't be able to see mistakes, like you could if I tried straight lines, or a grid, or something like that.)
Here are some pictures of those wavy lines:


And now I get to show off my finished placemat, with a narrow binding (about 3/8 inch) of the same light green as my butterflies are made of:


Voila! The placemat! She is finished!

Now you will have to excuse me, since I need to go and make a few more of these! I hope you enjoyed this tutorial, and I hope you'll visit all of the other bloggers on this hop for more projects and inspiration.

Be sure to join the linky party, too, and show off your own creations! You might just win a super-nice prize!!

Love,


PS I'm linking up today with the Shady Porch's Rock and Share linky party! Check out all the projects over there, too!

Thursday, January 26, 2012

Final Post for Embellishment Party!! Sunni's here!


It's the final day of our Embellishment Party, and we have the fabulous Sunni with us today! You can catch her posting on her blog and also guest posting on other lucky bloggers' pages, so we are happy that she had time to work up something for our party! Especially since she had a tremendous snow-storm and a three day power outage to contend with, too!


Welcome, Sunni!


Hi! I'm Sunni from Love Affair with my Brother
 No, it's not what you think!! I love my sewing machine!!

I was so excited when Jacque asked me to come up with a fun purse accent. I brainstormed for a few days and finally figured out what to do! Then my power was knocked out by a winter storm for 3 days. It came back on and then went back out again!!
Jacque was very gracious and understanding, and generously gave me a few more days to be able to sew up my project. Thanks Jacque!!


Zippers and Silk. It's like "Leather and Lace", only updated!
These flowers are so easy, your friends will never believe it!

You will need :
a 24" or larger zipper
fat quarter of silk or satin
felt for backing
pin back
basic sewing supplies
glue (can also do this step by hand-sewing)


I made a template
 that you can print out and use or just use your own shape. I am using the middle size. Cut 12 petal shapes if you are making a 6 petal flower.


I chose a very industrial looking zipper. I wanted big teeth to stand out against the silk. Cut a bit of the seam allowance off of your zipper. It fits better with such a small petal and makes turning easier.


Clip every 1/4" or so to accommodate the curve of the petal. Don't clip all the way to the teeth. Just a little will be sufficient.


Sew the zipper on one layer at a time. Slow and steady wins the race here. The curve of the petal was so sharp that it was very difficult to sandwich it between both layers. Just sew it on the front, sandwich the zipper between the layers and sew directly on the first stitch line.
If you are an expert, just go ahead and sandwich the zipper between both petal layers and sew.


This is just before I added the second layer on top and sewed.


Assemble all 6 petals and turn right side out and press. Then plug in your glue gun. I am using a composition notebook so I don't get glue on my carpet!


Using a needle and strong thread, run a basting stitch from edge to edge of the first petal. Continue adding petals, one right next to each other. I was careful to make sure that my zippers all faced up at the sides.


Once all of the petals are basted onto the thread, tie it in a circle to create a flower shape. Glue a felt circle on the back to stabilize the petals and be a base for your pin back. Glue your pin back onto the felt.


For the center of the flower, you can make a zipper swirl. Just roll and glue, roll and glue until you are happy with it. Glue it onto the center.


You can also use the zipper pull as your flower center. Just be sure to pull your circle very tight! I liked the pull better because it creates a bit of an illusion. As if you could just unzip the flower! My oldest immediately started pulling on the tab trying to unzip it! 


Then just pin it on your purse, scarf, or headband!! I'm sure you could think of a bunch of places to use these flowers!


To Jacque and all your awesome readers: Thank you so much for having me and being so understanding for my "extended" deadline!


Thanks, Sunni, for such an awesome tutorial --- these have a lot of potential uses as embellishments! So glad that your power is back, and all is well. After all, the worst part of an outage is that your sewing machine won't run, right?!  (Grin)
If you enjoyed this tute, please leave Sunni a comment, and be sure to stop in at her blog --- there are lots of fun things happening there!


I'm also linking up with Making Rebecca Lynne's Thursday Think Tank linky party.....stop by there for some creative inspiration, OK?


Love,


Thursday, January 12, 2012

Gilding Lilies . . .

Recently I quoted from the ATeam TV show, and today I'm giving a nod to Shakespeare --- I think that may be going from the ridiculous to the sublime, eh? (Grin)


Gilding the lily has always referred to placing more ornamentation on something that was already quite nice. Let me explain where I am going here . . . I've seen all over blogland, that quilters and sewists are creating bags, totes and purses. Lovely creations from stellar fabric lines, and the patterns are all over the place, from simple chic to positively elegant.

But have you ever looked at your tote or purse and wanted to add just a little something? A little "wow" or a little "zing"?? Personally, I find that my taste is becoming a little more flamboyant now --- soon I may be the little silver-haired lady with the red pants and orange jacket, accessorized by gold shoes and a green bag. Well, no, on second thought. I don't think so. But I do love me a bag with personality!


So we are going to have a party! An embellishment party! Whoa . . .a three dimensional embellishment event! We are going to have two guest posters on Lilypadquilting, and I am so excited that they have agreed to participate --- you will love 'em!

First we'll hear from Jackie, a talented Canadian that I hope to meet in person some day! She is a quilt artist who blogs at Jackies Art Quilts and her works have been accepted in several juried shows. She writes a humorous column for a Canadian quilting magazine, and if you would like a chuckle, you should check out her articles here. We'll tell you more about her on Tuesday, the 17th, when she guest posts here.

Our second guest will be from the US of A, and many of you know her -- Sunni of Love Affair with my Brother!  I know I'm not the only one who clicked through the very first time, just because of the quirky title! You can read here how she came up with her blog name -- it's just as creative and fun as the quilts and projects that she designs! I know when you meet her, you'll want to add her blog to your "daily" list, for sure. Sunni will be with us on Tuesday, January 24th.

Lastly, I'll end our embellishment party with my post on Thursday, January 26th. I hope that you are intrigued by our party, and that you come back to the Lilypad on those dates, and enjoy our three dimensional antics! (I hear there will be some giveaways.....just sayin'!!)

I'm linking up with Rebecca Lynne's Thursday Think Tank today -- be sure to check out the linky party! This is one way to cut the drama in 2012....just have some fun!


Love,